.png)
Dreaming of building your own house on land you own? It's a big project, for sure, but totally doable if you break it down. This guide is here to walk you through the whole process, from figuring out if the land is right for you to actually pouring the concrete for your foundation. We'll cover the stuff you need to think about before you even buy, how to get the money together, who you need on your team, and all the steps to get that foundation in place. It’s a lot, but taking it one step at a time makes it much less overwhelming.
Key Takeaways
- Before buying land, check soil conditions, zoning rules, and if utilities are nearby. This is super important for building house on land.
- Figure out your financing early. Land loans can be different from regular mortgages, so shop around for the best rates and terms.
- Assemble a good team. You'll need a real estate agent who knows land, a builder you trust, and possibly engineers and surveyors.
- Prepare the site properly. This includes getting permits, clearing the land, and making sure the ground is ready for the foundation.
- Building a house on land takes time and patience. Expect unexpected issues and delays, and be clear on all contract details with your builder.
Understanding Land Purchase Considerations
Buying land to build your dream home is exciting, but it's also a big step that requires some serious thought before you sign on the dotted line. It’s not just about finding a pretty spot; you’ve got to make sure that spot is actually ready for a house and won't cause you a ton of headaches down the road. Think of it like picking out a puppy – you want to make sure it's healthy and a good fit for your family, not just that it looks cute.
Evaluating Soil Conditions and Stability
Soil is a big deal. Seriously, it’s one of the most important things to check. If the ground isn't stable, your foundation could have problems, and that’s a costly fix. You’ll want to get a soil test done. This is part of your due diligence, meaning you’re checking things out before you commit. If you buy land and start digging, only to hit water or find out the soil is super unstable, you’re in for a rough time. A geotechnical report can tell you a lot about what you're working with.
- Get a soil test: This is non-negotiable for a stable build.
- Check for water tables: You don't want to dig into a swamp.
- Understand load-bearing capacity: Can the soil support your house?
The ground beneath your future home is the literal foundation of your project. Ignoring its properties can lead to structural issues that manifest years later, costing far more than a simple soil test would have.
Navigating Zoning Laws and Local Ordinances
Every town or county has rules about what you can and can't build. These are called zoning laws and local ordinances. Some places might not allow certain types of homes, or they might have minimum size requirements. You’ll likely need to go through the local planning and zoning department for approval. If the land needs to be split into smaller lots, that’s another process. It’s worth looking into these rules early on, so you don’t end up with a piece of land you can’t build your dream home on. You can often find this information on your local government's website or by visiting their offices. Understanding these regulations is key to a smooth custom build process.
Assessing Utility Access and Infrastructure Needs
Think about how you’ll get water, power, and sewer service to your house. If the land doesn't already have hookups nearby, bringing utilities in can be surprisingly expensive. You might need to drill a well for water and install a septic system for waste, which can add tens of thousands of dollars to your project cost. Also, consider road access. Will you need to build a driveway, or even a new road if the property is far from an existing one? These are all costs that need to be factored into your budget.
- Water Source: Well or public water?
- Wastewater: Septic system or sewer?
- Power: Proximity of electrical lines.
- Internet/Cable: Availability and cost of service.
Understanding Property Setbacks and Easements
Setbacks are basically rules about how far your house has to be from the property lines, roads, or even other structures. Easements are rights that allow others to use a portion of your land for specific purposes, like utility lines or access roads. You need to know where these are so you don't plan to build your house right on top of a utility line or in a spot where you can't legally place it. Surveyors can help map these out for you.
- Front, rear, and side setbacks: How close can you build to the edges?
- Utility easements: Where can utility companies access lines?
- Access easements: Does someone else have a right to cross your land?
It’s really important to get all this information upfront. Don't just assume everything is straightforward. Doing your homework now can save you a lot of money and stress later on.
Securing Financing for Your Land and Build
Alright, so you've found the perfect spot for your dream home. That's awesome! But before you start sketching out floor plans, we need to talk about the money part. Getting a loan for land is a bit different than a regular mortgage for a house. Lenders see raw land as a riskier investment because, well, it's just land. There's no house to appraise or compare easily. This often means higher interest rates and shorter loan terms compared to what you'd get for a finished home.
Exploring Land-Only Loan Options
If you're not paying cash for the land, you'll likely be looking into a land loan. These can be a bit harder to find, especially for undeveloped or "raw" land. Raw land usually means no utilities, no roads, nothing. Lenders will want a bigger down payment, often 20% or more, and they'll want to see a solid plan for how you intend to develop it. They also tend to have stricter credit score requirements. Improved land, which might have utilities or road access already, is less risky and might come with slightly better terms, but it's usually more expensive upfront.
Comparing Lender Fees and Interest Rates
Don't just go with the first lender you find. Seriously, shop around. Different banks and credit unions will have different fees and interest rates. You might save a good chunk of change just by comparing a few options, especially on closing costs. It's worth the effort to get a few quotes and see who offers the best deal for your specific situation.
Considering Cash Purchases for Land Acquisition
Lots of people end up buying land with cash, especially if they plan to build right away. If a builder is going to start work, they need proof that you own the land outright. Paying cash avoids the hassle and potentially higher costs of a land loan. It simplifies things, and you don't have to worry about loan terms or interest.
Financing Through Builder Partnerships
Sometimes, builders have preferred lenders they work with. This can streamline the process. In some arrangements, the builder might even handle the financing upfront, build the house, and then you do a final closing on the completed home. Another option, if you're building in a rural area, is looking into USDA construction loans. These can sometimes cover the land purchase and construction costs all in one go, but they have specific income and location requirements.
Getting financing for land and then for the house can feel like two separate hurdles. If you plan to build soon after buying the land, a construction-to-permanent loan might be the way to go. This type of loan bundles the land purchase and the building costs into one package, which can be simpler than managing two separate loans. Just be sure you're ready to start building fairly quickly, as these loans often have timelines.
Here's a quick look at some financing avenues:
- Land-Only Loans: For purchasing the property itself. Often have higher rates and shorter terms.
- Construction Loans: For the actual building process. Funds are typically disbursed in stages (draws) as construction progresses.
- Construction-to-Permanent Loans: Combines land purchase and construction financing into a single loan that converts to a traditional mortgage after building is complete.
- USDA Loans: Available for eligible rural areas, potentially covering both land and construction for qualified buyers.
- Seller Financing: The property owner acts as the lender. Requires a solid contract and legal review.
Assembling Your Building Team
Alright, so you've got your land picked out, maybe even put in an offer. Now comes the really fun part: figuring out who's actually going to help you build this dream house. It’s not just about finding one person; it’s about putting together a solid crew. Think of it like assembling your favorite sports team – you need the right players in the right positions.
Selecting a Reputable Real Estate Agent
This person is your first point of contact, especially if you're still in the land-buying phase. A good agent who knows the local market and understands what goes into building on raw land can be a lifesaver. They can help you spot potential issues with a property before you get too far down the road, and they'll be your advocate during negotiations. Look for someone who has experience with land sales and new construction, not just resale homes. They should be able to guide you through the whole process, from finding the right spot to understanding the initial paperwork. It’s about finding someone you trust to have your back.
Choosing an Experienced Home Builder
This is probably the biggest decision you'll make. Your builder is going to be your partner for months, maybe even over a year. You want someone with a proven track record, a solid portfolio, and good reviews. Don't be afraid to ask for references and actually call them. Ask about their experience with similar projects, how they handle unexpected problems, and what their communication style is like. It's also smart to check how long they've been in business; a builder with years of experience likely knows how to handle the common hiccups that pop up.
- Portfolio Review: Look at homes they've built. Do you like the style? Is the quality evident?
- Reference Checks: Talk to past clients. Were they happy with the process and the final product?
- Contract Clarity: Make sure you understand every detail of the contract before signing.
- Local Knowledge: Do they understand local building codes and potential site challenges?
Engaging Soil Engineers for Site Analysis
Before you even think about pouring concrete, you need to know what's under your feet. That's where a soil engineer comes in. They'll test the soil to see if it's stable, how much water it holds, and if it's suitable for building. This step is super important because bad soil conditions can lead to serious foundation problems down the line, costing you a fortune to fix. They'll give you a report that your builder and architect will use to design the right kind of foundation for your specific piece of land. It’s a bit of an upfront cost, but it’s way cheaper than dealing with structural issues later.
Hiring Surveyors for Property Boundaries
Surveyors are the folks who make sure you know exactly where your property lines are. This might seem obvious, but it's critical. They'll mark the boundaries, identify any easements or rights-of-way that might affect your build, and confirm things like flood zone status. You don't want to accidentally build a fence or a shed on your neighbor's property, or find out later that a utility company has the right to run lines through your backyard. A good survey prevents a lot of headaches and potential legal disputes. It’s a key step in building a house in California or anywhere else, really.
Building a house is a marathon, not a sprint. Surrounding yourself with a team of professionals you trust and who communicate well will make the journey much smoother. Don't rush the selection process; take your time to find the right people for the job. Your future self will thank you.
Site Assessment and Preparation
Before you even think about pouring concrete, you've got to get the land ready. This part is super important, and honestly, it's where a lot of projects can go sideways if you're not careful. It’s all about making sure the spot where your house will sit is stable, legal, and ready for the heavy work ahead.
Conducting a Feasibility Study for Your Property
Think of this as a deep dive into what your land can actually handle. It's not just about whether a house can fit, but where it should go. You'll want to look at things like:
- Soil Conditions: Is the ground solid enough? Are there weird pockets of soft dirt or a high water table that could cause problems later?
- Topography: Is the land flat, or is it a steep hill? This affects how much grading you'll need and where you can build.
- Drainage: Where does water naturally flow on your property? You don't want your new house sitting in a puddle.
- Access: How will construction vehicles and material trucks get to the building site without tearing up the rest of your land?
This study helps you figure out the best spot for your house, driveway, and any other structures, making sure everything works together and avoids potential headaches down the road.
Understanding Property Setbacks and Zoning Requirements
This is where you get into the nitty-gritty rules. Zoning laws dictate what you can build and where. Setbacks are minimum distances your house must be from property lines, roads, and sometimes even existing features like wells or septic systems. These aren't suggestions; they're legal requirements. You'll need to find out what these are for your specific piece of land. Ignoring them can lead to fines or even having to move your entire foundation.
Obtaining Necessary Building Permits
Once you know where you can build and what the rules are, you need to get permission from your local government. This usually involves submitting detailed plans for your house and site preparation. The process can take time, so it's best to start this early. You might need:
- A land disturbance permit for clearing and grading.
- A building permit for the actual construction.
- Permits for utility connections (water, sewer, electricity).
Your local building department is the place to go for the exact requirements in your area. They'll tell you what forms you need and what inspections will happen along the way.
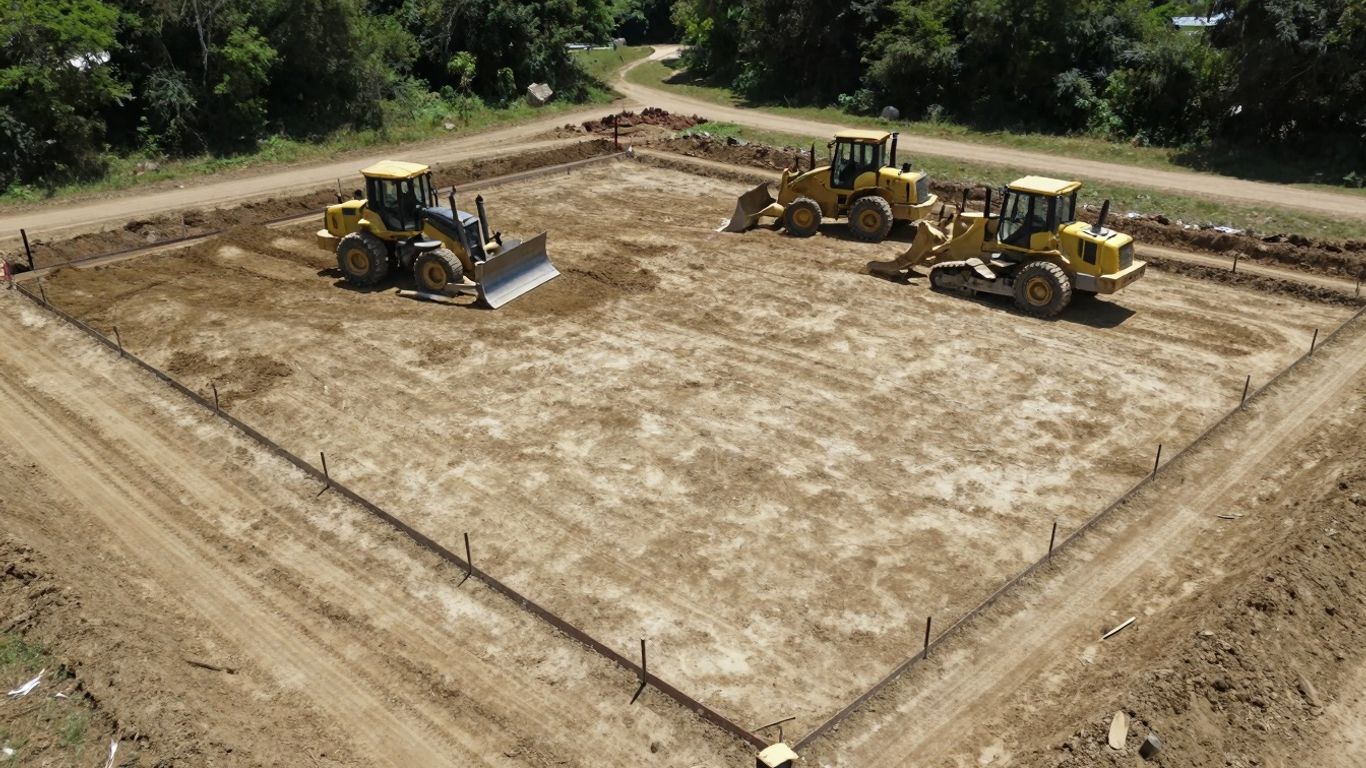
Strategic Land Clearing and Site Preparation
With permits in hand, it's time to get the site ready. This means clearing out trees, brush, and any other obstacles from the building footprint and access areas. It's not just about making it look tidy; it's about creating a stable, level base for your foundation. This often involves:
- Grading: Shaping the land so it slopes away from where the house will be, promoting good drainage.
- Excavation: Digging down to reach stable soil for the foundation footings.
- Compaction: Making sure the soil is packed down tightly to prevent settling later.
This stage is critical. Rushing through clearing or skipping proper grading can lead to serious structural issues down the line. It's worth hiring experienced professionals who know how to prepare a site correctly for building.
Foundation Design and Planning
Alright, so you've picked out your land, and now it's time to think about what your house will actually sit on. This is where the foundation comes in, and let me tell you, it's not just some concrete slab. It's the base that holds everything up, from your walls and roof to you and your family. Getting this part right is super important for the whole house's stability and how long it lasts.
Understanding the Purpose of House Foundations
The main job of a foundation is to take all the weight of your house and spread it out evenly onto the ground. This stops the house from sinking unevenly, which can cause all sorts of problems like cracks in the walls or floors. Think of it like the sturdy legs of a table; without them, the whole thing wobbles and falls apart. A good foundation keeps your home steady and secure for years to come. It's the first step in making sure your house is a safe place to be.
Determining Appropriate Foundation Types
There are a few main ways to build a foundation, and the best one for you depends on a few things. The two big categories are shallow and deep foundations. Shallow ones, like spread footings or slab-on-grade systems, are common for regular houses and don't go too far down. They're great when the soil is pretty good right near the surface. Deep foundations, like piers or piles, are for when you need to reach stronger soil or bedrock further down, or if the topsoil isn't great. Your builder and maybe a soil engineer will help figure out which type makes the most sense for your specific spot. It's all about matching the foundation to the land and the house you want to build.
Here's a quick look at some common types:
- Slab-on-Grade: A single concrete slab poured directly on the ground. Often includes built-in footings and moisture barriers. Good for relatively stable soil. Learn about land.
- Crawl Space: A shallow foundation that creates a space between the ground and the first floor. Allows for easier access to utilities.
- Basement: A full or partial underground level. Offers extra living or storage space but requires more extensive excavation.
- Pier and Beam: Uses concrete piers or columns to support the house, with beams connecting them. Often used on sloped sites.
Considering Soil Conditions for Foundation Design
This is a big one. The ground beneath your house isn't always the same. Some soil is firm and can hold a lot of weight, while other soil might be soft, sandy, or even have a high water table. You really need to know what you're building on. A soil test will tell you if the ground can support your house as-is, or if you need to do some extra work, like digging out soft soil and replacing it with gravel or compacted earth. Ignoring soil issues is a recipe for disaster down the road. It's worth getting a professional opinion here to avoid costly repairs later.
The type of soil you have directly impacts how the foundation needs to be built. Clay soils can expand and contract with moisture, while sandy soils might shift. Understanding these properties is key to preventing future structural problems.
Budgeting for Foundation Construction
Foundations aren't cheap, and it's easy to underestimate the cost. The price can change a lot depending on the type of foundation you need, the size of your house, and the specific conditions of your land. Things like excavation, concrete, steel reinforcement, and labor all add up. It's smart to get detailed quotes from a few different builders or foundation specialists. Make sure you understand exactly what's included in their price. Don't forget to factor in potential costs for dealing with unexpected soil issues or difficult site access. Planning your budget carefully now will save you headaches later in the build process.
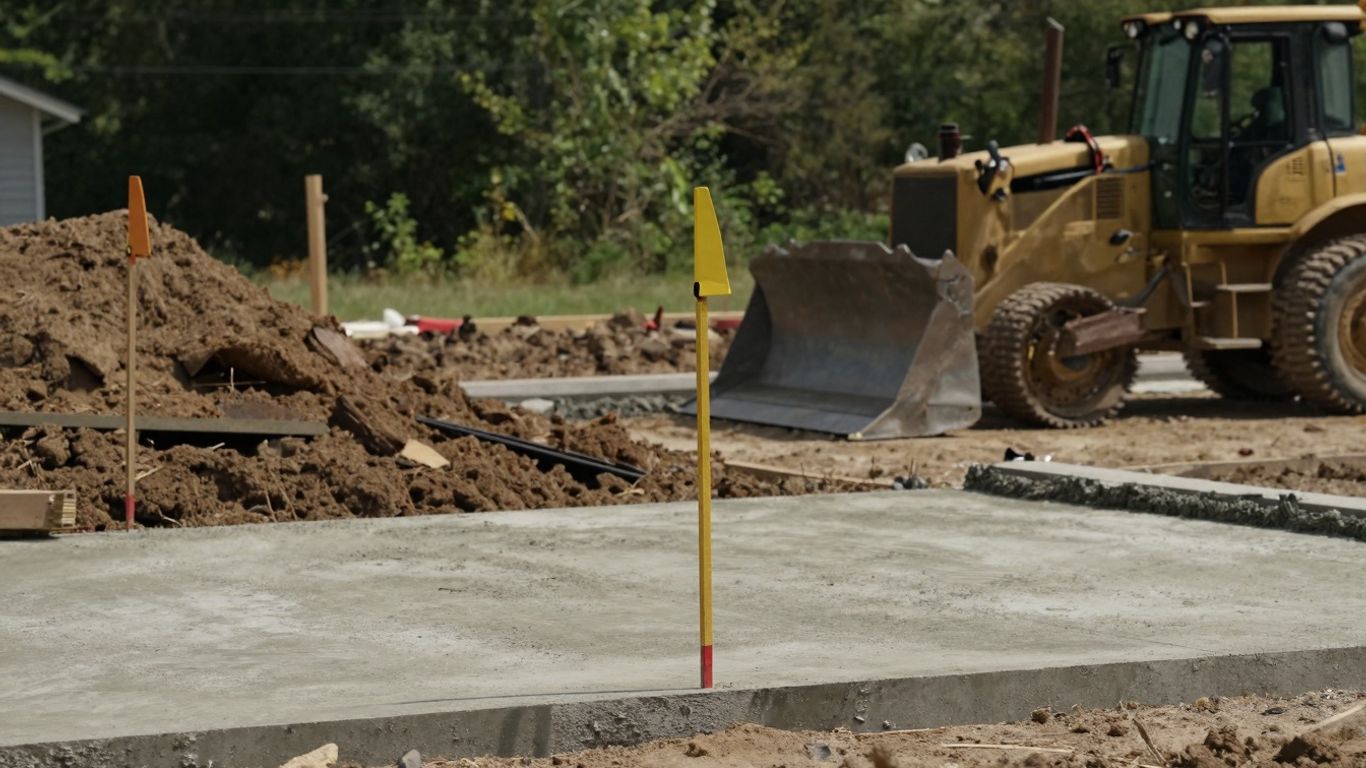
Preparing the Foundation Site
Alright, so you've picked out your spot and figured out the foundation type. Now comes the nitty-gritty of getting that ground ready. This is where things start to look like a construction zone, and it's super important to get it right. Think of it as setting the stage for your whole house.
Accurate Layout and Marking of Foundation
First things first, we need to mark exactly where the foundation is going. This isn't just eyeballing it. We use string lines, stakes, and sometimes spray paint to get precise outlines. This step is critical because any mistakes here will carry through to the concrete pouring. It's like drawing the blueprint directly onto the earth. We need to make sure the layout matches the plans exactly, down to the inch. This is where a good surveyor's report really pays off, showing you the exact property lines and any easements.
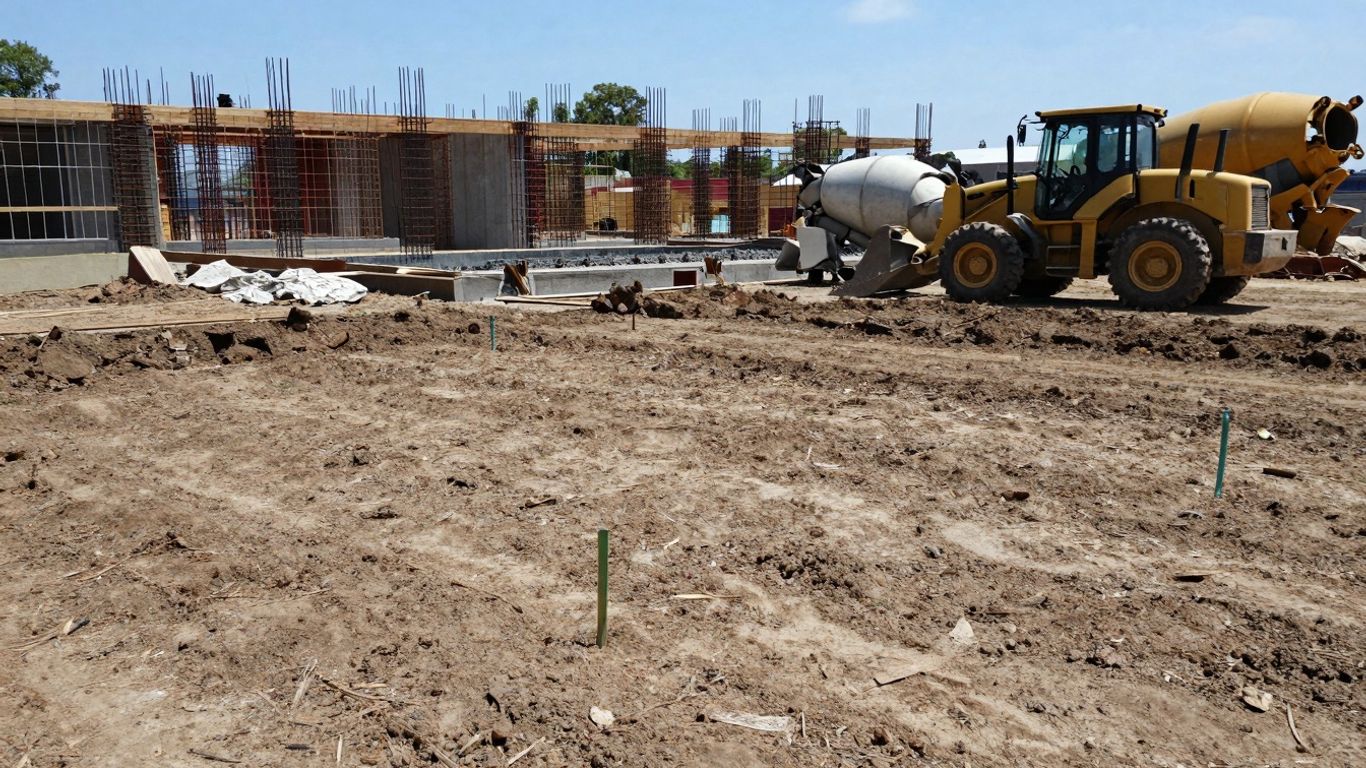
Excavating Foundation Trenches and Footings
Once everything is marked, the digging begins. We're excavating trenches for the footings and the foundation walls. The depth and width depend a lot on the soil type and the weight of the house. If you've got loose soil, you'll need to dig deeper for stable ground. It’s also important to make sure these trenches have a slight slope for drainage, so water doesn't just sit there. We want a solid, dry base.
Implementing Anti-Termite Treatment
Termites are no joke, especially when you're building with wood. Before any concrete goes in, we treat the sides and bottom of the trenches. This creates a barrier to keep those pesky critters out. You'll want to pick a treatment that works for your soil and groundwater situation. Always follow the product instructions carefully – safety first!
Ensuring Proper Soil Compaction for Stability
After digging and treating, we need to make sure the soil at the bottom of the trenches is packed down tight. This is called compaction. We use tools like hand tampers or even mechanical plate compactors for this. Compacting the soil makes it denser and better able to support the weight of the foundation and the house. You want to do this when the soil is slightly damp, not too dry or too wet. It helps prevent the ground from settling later on, which can cause all sorts of problems.
Getting the site preparation right is like building on a solid rock instead of sand. It might seem like extra work now, but it saves a ton of headaches down the road. Skipping steps here is a recipe for future structural issues.
Here's a quick rundown of what happens during this phase:
- Layout: Precisely marking the foundation's footprint.
- Excavation: Digging trenches for footings and walls.
- Treatment: Applying termite barriers.
- Compaction: Packing the soil for a stable base.
- Grading: Ensuring the site is level and drains properly.
This preparation phase is absolutely key. It sets the foundation for everything that follows, so taking the time to do it correctly is a smart move for the longevity of your home.
Essential Tools and Materials for Foundation Work
Alright, so you're ready to get down to the nitty-gritty of building your foundation. This is where things start to get real, and having the right gear makes all the difference. It’s not just about having stuff; it’s about having the right stuff to get the job done safely and correctly. Having a solid plan and the proper equipment prevents a lot of headaches down the road.
Gathering Excavation and Digging Tools
Before you can pour anything, you've got to dig. For smaller jobs, a good old-fashioned shovel and a pickaxe for tougher spots will do. If you're dealing with a lot of ground, you might consider renting a small excavator or a skid steer. Don't forget a wheelbarrow to move dirt and materials around – it's a lifesaver. You'll also need stakes and string lines to mark out exactly where your foundation will go, and a spirit level to make sure everything is plumb and true.
Acquiring Concrete Mixing and Pouring Equipment
Concrete is the backbone of your foundation, so getting it right is key. You'll need a concrete mixer. For smaller batches, a portable mixer works fine, but for a whole foundation, you might need a larger one or even arrange for a concrete truck delivery. You'll also need tools for spreading and smoothing the concrete, like shovels, rakes, and trowels. A vibrator can help get rid of air bubbles in the concrete, making it stronger.
Sourcing Reinforcement and Structural Materials
Concrete is strong in compression, but it needs help with tension. That's where rebar (reinforcing steel bars) comes in. You'll need to figure out the right size and amount of rebar based on your foundation design. You'll also need formwork – usually made of wood or metal – to hold the wet concrete in the shape you want while it hardens. Make sure your formwork is sturdy and well-braced.
Essential Measuring and Marking Supplies
Precision is super important here. You'll need good quality measuring tapes, chalk lines, and spray paint for marking out the foundation's perimeter and any internal walls. Surveying equipment might be necessary for larger or more complex sites to ensure everything is perfectly aligned with property lines and building codes. Don't skimp on this; accurate measurements prevent costly mistakes later on.
Getting the right tools and materials isn't just about efficiency; it's about building a foundation that will last. Think of it as investing in the long-term stability and safety of your home. Using the wrong tools or cutting corners on materials can lead to serious structural issues down the line, costing you much more in repairs than you would have spent upfront.
Here's a quick rundown of what you'll likely need:
- Digging: Shovels, pickaxe, wheelbarrow, possibly a small excavator.
- Formwork: Lumber (like 2x4s or plywood), stakes, screws/nails, bracing.
- Reinforcement: Steel rebar, rebar ties, bar chairs.
- Concrete Work: Concrete mixer, trowels, floats, screeds, concrete vibrator (optional but recommended).
- Measuring & Layout: Measuring tapes, string lines, stakes, chalk line, spirit level, spray paint.
- Safety: Gloves, safety glasses, sturdy boots.
Constructing the Foundation
Alright, so you've prepped the site, you've got your permits, and the soil is ready. Now comes the part where we actually build the base for your new home: the foundation. This isn't just a concrete slab; it's the bedrock of your entire house, literally. Getting this right means your home will stand strong for years to come.
Installing Wooden Formwork for Concrete
Before we can pour any concrete, we need to create a mold for it. This is where wooden formwork comes in. Think of it like building a temporary, precise box around where your foundation will be. We use wooden planks or plywood, carefully set up along the edges of your foundation trenches. It's super important that these forms are braced well. If they aren't, the weight of the wet concrete can push them out of shape, and that messes up the final dimensions of your foundation. We use spirit levels to make sure everything is plumb and square. A little trick is to coat the inside of the forms with a release agent – this stops the concrete from sticking, making it easier to remove the forms later and giving you a cleaner finish.
Mixing and Pouring Concrete for Footings
Now for the main event: the concrete. You'll want a good quality mix, paying close attention to the water-to-cement ratio. Too much water weakens the concrete, and too little makes it hard to work with. The concrete is typically poured into the foundation trenches in layers, usually about 18 to 24 inches deep at a time. As we pour, we use a tamping rod to work out any air bubbles. These air pockets can create weak spots, so getting rid of them is key. Once poured, the top surface needs to be leveled and smoothed out. This is where you really start to see the foundation taking shape.
Placing Reinforcement Steel
Concrete is strong under compression, but not so great with tension. That's where steel reinforcement, or rebar, comes in. It adds the tensile strength your foundation needs to resist cracking, especially from ground movement or temperature changes. You'll want to consult with a structural engineer on the exact rebar design – size, spacing, and how it's arranged. The rebar is placed within the formwork before the concrete pour, often held up by small plastic or metal chairs to ensure there's enough concrete cover all around the steel. This steel cage is what gives your foundation its long-term durability and helps prevent those annoying cracks from showing up later.
Ensuring Proper Curing of Concrete
This step is often overlooked, but it's absolutely vital. Curing isn't just letting the concrete dry; it's a chemical process where the concrete gains strength. We need to keep the concrete moist for at least seven days after pouring. This is usually done by spraying it with water regularly or covering it with wet burlap. Proper curing is what makes the concrete reach its intended strength and durability. Skipping this step can lead to a weaker foundation that might not perform as well over time. It’s a patient process, but it’s what makes the foundation truly solid.
Building a solid foundation is like setting the stage for a great performance. Everything that comes after – the framing, the walls, the roof – relies on this base being perfectly executed. Don't rush it, and make sure all the steps are followed precisely. It's the difference between a house that stands the test of time and one that develops problems down the road.
Here's a quick look at what goes into the concrete mix:
Navigating Potential Building Pitfalls
Building a house on land you've purchased is a big undertaking, and honestly, things don't always go perfectly. It's like trying to assemble IKEA furniture without the instructions – sometimes you end up with extra parts, and other times, the whole thing is a bit wobbly. Being prepared for a few bumps in the road can save you a lot of stress and headaches down the line.
Clarifying Builder Contract Details
This is probably the most important step before you even break ground. You need to know exactly what you're getting into with your builder. Most contracts will outline the basic finishes, and if you want anything fancier – like granite countertops instead of laminate, or upgraded flooring – that's usually an extra cost. Make sure every single detail is written down and agreed upon. Don't be afraid to ask questions, and if something doesn't make sense, get it clarified. It might be worth having a lawyer look over the contract, especially if you're new to this. It's your responsibility to understand what you're signing.
Anticipating Project Timeline Delays
Building timelines are rarely set in stone. You might think your house will be done in six months, but then delays happen. These can pop up for all sorts of reasons: zoning issues that take longer than expected, problems getting utilities hooked up, or even just a shortage of skilled labor or materials. If your land is in a more remote spot, getting heavy equipment in and out can also slow things down. It's wise to expect that your project will take longer than the initial estimate. Building a home is a marathon, not a sprint.
Managing Expectations During the Build Process
It's easy to get excited and imagine your dream home finished in no time. But the reality of construction involves a lot of moving parts. You'll want to stay in communication with your builder, but also understand that they're juggling multiple projects and challenges. Sometimes, what you envisioned might need to be adjusted based on what's feasible or available. Keeping an open mind and a calm attitude will help you get through the process more smoothly.
The Importance of Patience in Custom Builds
Honestly, patience is your best friend when building on your own land. Things will take time. You might have to wait for permits, for materials to arrive, or for inspections. Instead of getting worked up about every little delay, try to view the entire process as a journey. Enjoy seeing your home take shape, even if it's slower than you'd hoped. Remember, rushing can lead to mistakes, and you want this house to be right. It's a big investment, and taking the time to do it well is worth it. If you're looking for more information on the costs involved, checking out resources on financing your barn project can be helpful.
Building a new home can be tricky, but don't let potential problems stop you. We've put together some tips to help you avoid common issues. Want to learn more about how to steer clear of building troubles? Visit our website for helpful advice and expert guidance.
Wrapping It Up
So, you've made it through the whole process, from finding that perfect piece of land to getting the concrete poured for your foundation. It's a lot, right? There were probably moments you wondered if it was all worth it, especially when dealing with unexpected issues or just the sheer amount of paperwork. But remember, every step, even the tricky ones like soil tests or zoning checks, was about building a solid base for your future home. Take a breath, pat yourself on the back, and get ready for the next exciting phase. You've laid the groundwork, literally, for your dream house.
Frequently Asked Questions
What's the first thing I should check when thinking about buying land to build on?
Before you even think about buying land, it's super important to check the soil. You want to make sure the ground is stable and can hold up a house. It's also a good idea to look into zoning laws to see what you're allowed to build and if there are any special rules for that area. Don't forget to see if water, electricity, and sewer lines are nearby or if you'll have to pay a lot to get them there.
How do I pay for the land and the house I want to build?
You have a few options! Some people pay for the land with cash, which can make things simpler. Others get a special loan just for the land, which might have different rules than a regular home loan. Sometimes, builders offer packages where they help you finance both the land and the build. It's smart to compare different lenders to find the best deals on interest rates and fees.
Who are the important people I need to hire to help me build a house?
You'll definitely want a good real estate agent who knows about building on land. Then, you need a trustworthy home builder who has a good track record. You might also need a soil engineer to check the ground and a surveyor to mark your property lines accurately. Think of them as your building dream team!
What does 'site assessment and preparation' really mean?
This means looking closely at your land to figure out the best place to build your house. It involves checking things like how much space you need to leave from property lines (setbacks) and making sure you have all the permits needed. Then, you'll clear the land, removing trees and bushes, to get it ready for digging the foundation.
Why is the foundation so important for my house?
The foundation is like the house's feet – it's the base that holds up the entire building! Its main job is to spread the weight of the house evenly onto the ground. This stops the house from sinking unevenly, which could cause cracks and damage over time. A strong foundation means a safe and stable home.
What are the basic steps to actually build the foundation?
First, you'll mark out exactly where the foundation will go. Then, you'll dig trenches for the footings, which are the base parts. It's important to treat the soil for termites before you pour concrete. After that, you'll build wooden forms, pour concrete for the footings, and add steel bars for extra strength. Finally, you let the concrete harden properly.
What tools and materials will I need to build the foundation?
You'll need tools for digging, like shovels and maybe a pickaxe. For working with concrete, you'll need mixers, wheelbarrows, and tools for smoothing. You'll also need wood for forms, steel bars for strength, and of course, concrete, sand, cement, and water. Measuring tapes and levels are crucial for accuracy!
What kind of problems might pop up when building a house on land?
Things don't always go perfectly. Your builder's contract needs to be super clear about everything included, so there are no surprises. Weather, getting materials, or unexpected issues with the land can cause delays. It's also important to be patient, because building a custom home takes time. Talking everything through with your builder and agent can help avoid many issues.
Consultation Today!