.png)

Building your dream home in Oklahoma is an exhilarating journey, but imagine the gut-wrenching feeling of watching cracks appear in your new walls, all because of a mistake made before the first slab was even poured. The success of your entire project rests on a single, often overlooked phase: site preparation for building a house. Many future homeowners, excited by floor plans and finishes, underestimate this critical groundwork, only to face unexpected delays, budget-busting soil issues, or drainage nightmares that could have been prevented.
The fear of pouring your life savings into a foundation on unstable ground is real, but it doesn't have to be your story. This guide provides the expert-backed, actionable checklist you need to transform a raw piece of land in Edmond, Shawnee, or anywhere in between into a perfectly prepared canvas for your custom home. With over 15 years of experience, ACET Custom Homes knows that what happens before the first wall goes up determines the quality and longevity of the home for decades to come.
"A dream home is only as strong as the ground it's built on. We see the relief on our clients' faces when they realize we've handled the complexities of the site work. They can trust that their home is built to last from the ground up." - Bono, Project Manager, ACET Custom Homes
This comprehensive listicle breaks down the 10 non-negotiable steps every Oklahoman must take during the site preparation for building a house. We'll cover everything from geotechnical analysis and utility planning to grading and permitting, ensuring your build starts on solid, stable, and legally compliant ground. Following these steps will save you from costly surprises and provide peace of mind for your investment.
1. Site Survey and Boundary Verification: Drawing the Lines for Your Dream
Before a single shovel hits the dirt, the first critical step in your site preparation for building a house is a professional land survey. This foundational process moves your property from an abstract concept on paper to a precisely defined, buildable space. A licensed surveyor uses advanced technology, like GPS and Total Stations, along with historical deeds and public records to establish the exact legal boundaries, identify any easements or rights-of-way, and create an official site map.
This survey is a non-negotiable requirement for obtaining building permits and is essential for preventing future headaches. It guarantees your custom home’s placement complies with local setback ordinances, ensuring you don’t encroach on neighboring properties or restricted areas. Think of it as creating the official canvas upon which your architect will design your masterpiece.

Why This Step is Non-Negotiable
Ignoring or delaying a survey can lead to disastrous and expensive mistakes. For instance, an ACET Custom Homes client in Deer Creek discovered an old, unrecorded utility easement directly through the middle of their planned building footprint during the survey. This early discovery allowed us to redesign the home's position before finalizing architectural plans, saving them tens of thousands in potential relocation costs and legal fees.
In more rural Oklahoma areas like Macomb or Elmore City, surveys are crucial for verifying acreage and locating property lines that may not have been formally marked for decades. Properly understanding your land from the very beginning is a key part of the comprehensive process detailed in our guide to building a house on land from purchase to foundation.
Actionable Tips for Your Survey
To ensure a smooth process, follow these best practices:
- Schedule Immediately: Commission the survey right after purchasing your lot, well before your architect begins detailed design work.
- Request Digital Files: Ask your surveyor for digital copies of the plat map (such as DWG or PDF files). These are essential for your builder and design team to work with accurately.
- Walk the Property: Join the surveyor on-site to physically see the marked property corners and boundary lines. This is the perfect opportunity to ask questions and understand any unique features of your land.
- Safeguard Your Documents: Keep the final, signed survey documents with your important property records. They are invaluable for future projects, refinancing, or selling the property.
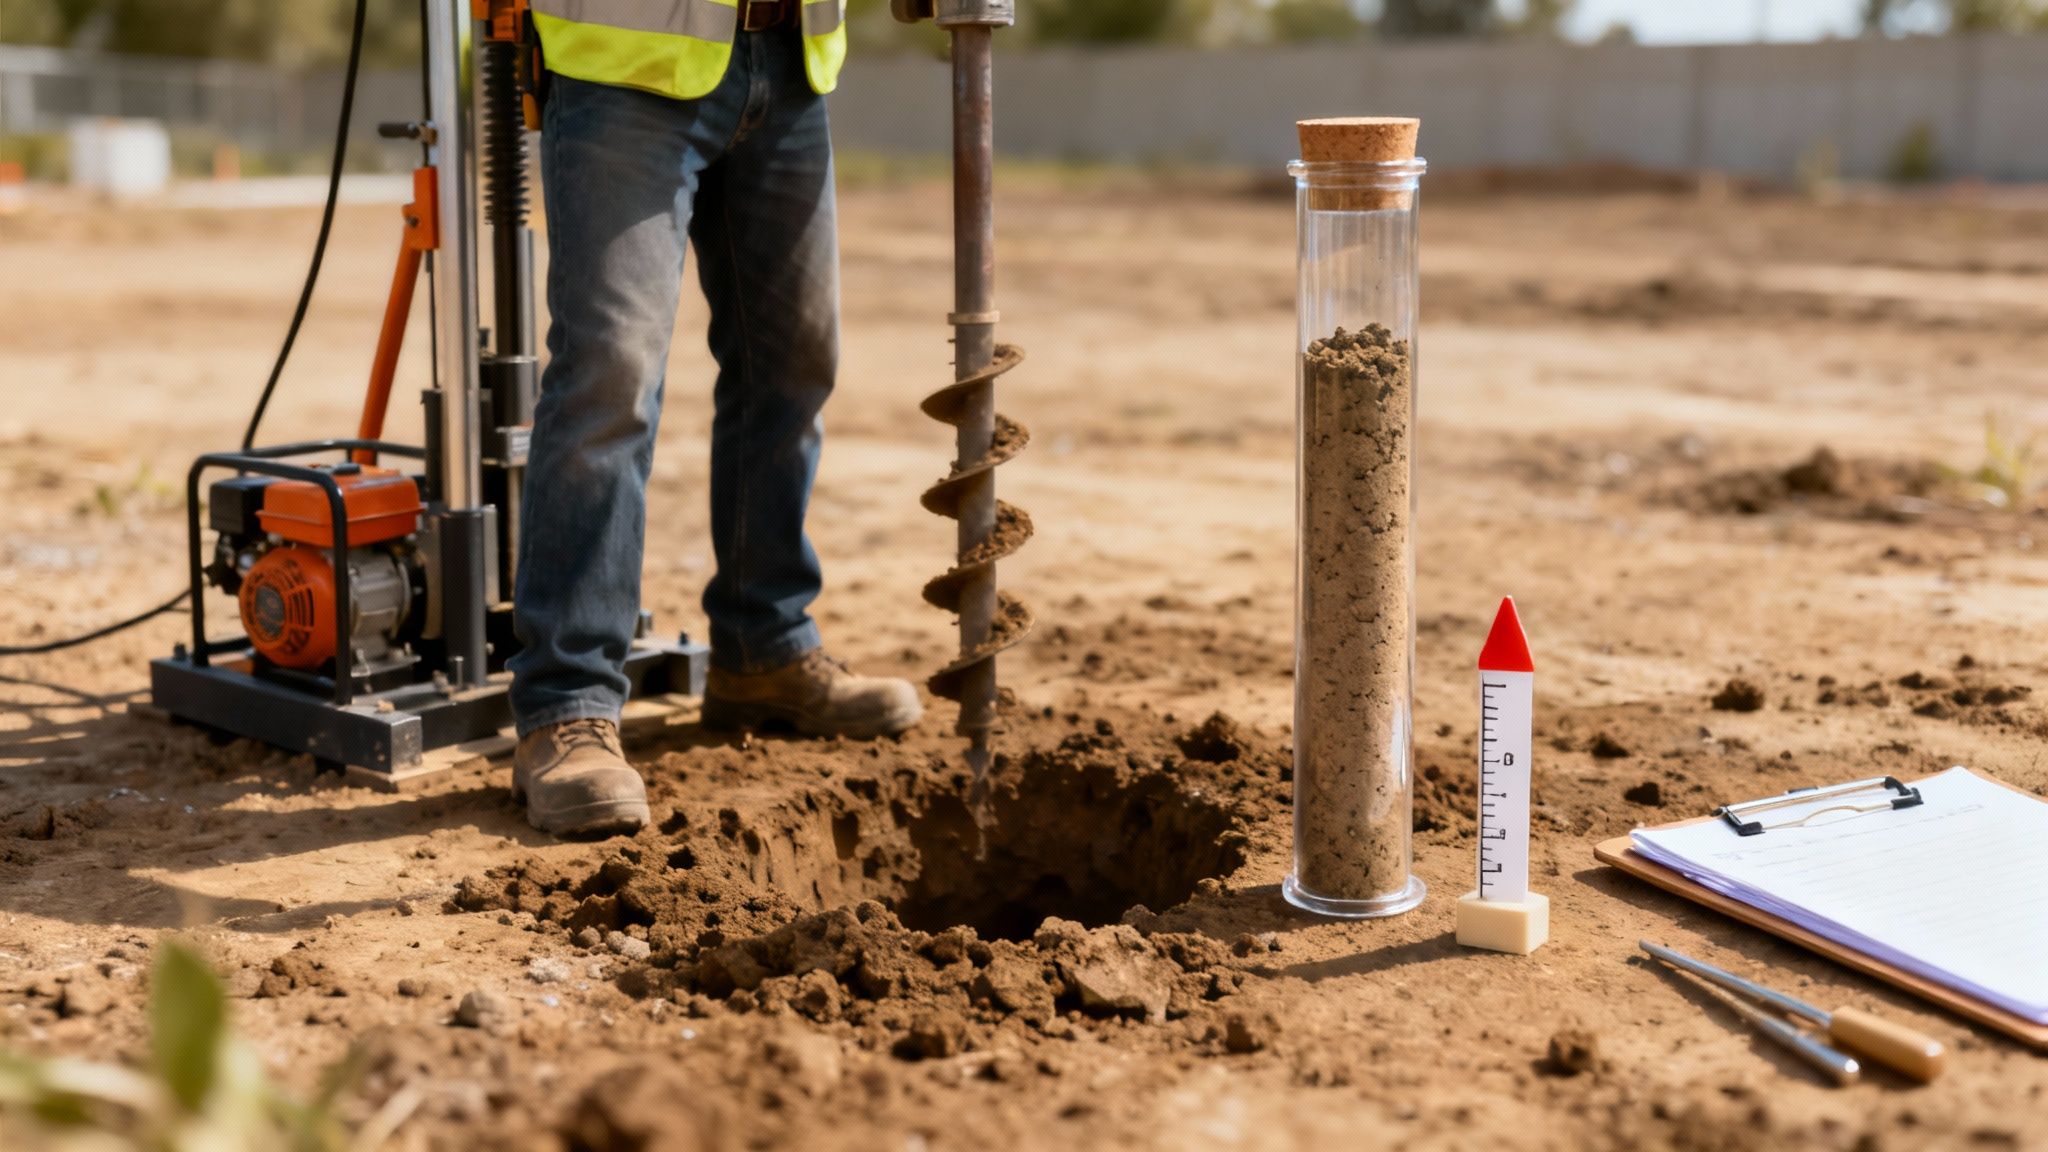
2. Soil Testing and Geotechnical Analysis: Understanding Your Home’s Foundation
Once your property lines are set, the next crucial step in site preparation for building a house is to look beneath the surface. A geotechnical analysis, commonly known as soil testing, is the process where engineers evaluate the soil's composition, strength, and stability. This scientific investigation determines how the ground will behave under the immense weight of your home, ensuring the foundation is designed to last a lifetime without failing.
This analysis is indispensable in Oklahoma, where soil composition varies dramatically. From the expansive red clays common in Oklahoma City and Edmond to the sandy loams in more rural areas, each soil type presents unique challenges. A geotechnical engineer will take core samples to assess load-bearing capacity and identify potential issues like high plasticity or groundwater, which are critical for designing the correct foundation system and preventing future structural damage.
Why This Step is Non-Negotiable
Skipping a geotechnical report is a high-stakes gamble with your home’s structural integrity. Oklahoma's expansive clay soils are notorious for swelling when wet and shrinking when dry, a cycle that can cause severe foundation movement, cracks in drywall, and doors that refuse to close. For a client building near Norman, our initial soil test revealed a highly reactive clay layer just a few feet down, a detail that would have been missed by a simple visual inspection.
This discovery prompted our structural engineer to specify a more robust post-tension slab foundation, a proactive measure that prevented guaranteed long-term settling issues. Understanding these subsurface conditions is a fundamental part of the custom home building process and is essential for safeguarding your investment from the ground up.
Actionable Tips for Your Geotechnical Analysis
To guarantee your foundation design is based on solid science, follow these steps:
- Hire a Licensed Professional: Always engage a reputable, licensed geotechnical engineering firm. Your structural engineer will base their entire foundation design on this report.
- Request Multiple Borings: For a typical residential lot, ensure the engineer takes samples from at least two or three different locations within the planned building footprint, at depths of 10-15 feet or more.
- Discuss Groundwater: Ask your engineer about seasonal high water tables or potential drainage issues identified in their findings, as this can impact foundation and basement design.
- Share the Report Early: Provide the complete geotechnical report to your architect and builder as early as possible. This allows them to integrate the specific foundation recommendations directly into the home's final design.
3. Utility Locating and Infrastructure Assessment: Mapping the Invisible Network
After defining your property lines, the next essential safety step in site preparation for building a house is to identify and map the unseen network of utilities running beneath your land. This process involves precisely locating all underground infrastructure, including water, sewer, electric, gas, and telecommunications lines. Failing to do so can lead to dangerous accidents, expensive repairs, and significant construction delays.
This step is a critical prerequisite for any excavation or grading work. By knowing exactly where existing utilities are, your build team can safely operate heavy machinery, plan for efficient tie-ins to your new home, and avoid the catastrophic mistake of rupturing a high-pressure gas line or a major fiber optic cable. Think of it as creating an x-ray of your property to ensure a safe and smooth foundation phase.
Why This Step is Non-Negotiable
This is more than just a best practice; it's the law. Before any digging begins, you must contact a "call before you dig" service. For instance, ACET Custom Homes always coordinates with Oklahoma 811 to have public utility companies like OG&E and Oklahoma Natural Gas come out and mark their lines. This service is typically free and prevents costly and life-threatening mistakes.
On a recent project in a rural area near Shawnee, this initial call revealed a main water line that was not on any city plans, running right through the proposed garage location. Discovering this early allowed us to adjust the foundation footprint without impacting the overall design, a crucial part of the detailed process we outline in our guide to custom home planning. For properties outside city limits, remember that private wells and septic systems will require a separate location service.
Actionable Tips for Utility Locating
To ensure a safe and efficient process, follow these key steps:
- Call 811 Early: Contact Oklahoma 811 at least three full business days before you plan to disturb any ground. This gives all associated utility companies time to respond and mark their lines.
- Clearly Mark Your Dig Area: Use white paint or flags to outline the proposed excavation area before the locators arrive. This helps them focus their efforts where it matters most.
- Document the Markings: Once the utilities are marked with colored flags and paint, take detailed photos and videos. These markings can fade or be disturbed, so having a visual record is invaluable for the construction team.
- Plan Your Connections: Discuss the location of these marked utilities with your builder early on. This helps determine the most efficient and cost-effective routes for connecting your new home to the grid.
4. Grading Plan Development and Site Drainage Design: Mastering Water Flow
Once the site is cleared, the next crucial phase of site preparation for building a house involves sculpting the land itself. A professional grading and drainage plan, developed by a civil engineer, establishes the precise slopes and contours needed to manage water effectively. This isn't just about creating a level spot for your foundation; it's a strategic design to channel rain and runoff safely away from your home, protecting its structural integrity for decades.
This plan dictates how the earth will be moved, ensuring every part of your lot slopes away from the foundation to prevent water intrusion, basement flooding, and costly soil erosion. For luxury homes, this step is often integrated with landscape design to create functional, beautiful outdoor spaces that coexist with the natural environment. Proper grading is a fundamental defense mechanism for your investment.

Why This Step is Non-Negotiable
A poorly graded lot is a recipe for disaster, especially in Oklahoma where heavy downpours can quickly overwhelm a property. In Norman and Edmond, where heavy clay soils are common, improper drainage can lead to oversaturated soil that exerts immense pressure on foundation walls. We’ve seen homes that skipped this engineering step suffer from chronic moisture issues and foundation cracks that could have been entirely avoided.
For properties near flood-prone areas, like those along the North Canadian River in the OKC metro, a sophisticated stormwater management plan is not just recommended, it's required. An engineered plan ensures your home sits at a safe elevation and that runoff is managed according to strict local ordinances. To understand how this fits into the larger picture, explore the essentials of building a house in Oklahoma from start to finish.
Actionable Tips for Your Grading Plan
Ensure your home remains high and dry with these best practices:
- Integrate Design Teams: Have your civil engineer, builder, and landscape designer collaborate on the grading plan to ensure a cohesive final result.
- Verify Proper Slope: The final grade should slope away from your foundation on all sides by a minimum of six inches over the first ten feet.
- Plan for Drainage Systems: If your property is flat or has clay soil, proactively include subsurface drains like French drains or surface solutions like swales in your design.
- Consider Future Landscaping: Finalize the grading plan with future patios, pools, or garden beds in mind to avoid expensive rework later.
- Budget Accordingly: Factor the cost of earthmoving, engineering, and any necessary drainage systems into your site preparation budget from the very beginning.
5. Environmental Assessment and Compliance Review: Protecting Your Health and Investment
Before moving dirt, it's crucial to understand what might be hidden within it. An Environmental Site Assessment (ESA) is a due diligence process that uncovers potential contamination, hazardous materials, and regulatory red flags like wetlands or protected species. This investigation is a key part of your site preparation for building a house, ensuring the land is safe and compliant with environmental laws.
This step protects both your family's health and your financial investment. A Phase I ESA reviews historical records to check for past uses that could have left contamination, such as old gas stations or agricultural operations. If concerns arise, a Phase II ESA involves physical soil and groundwater testing to confirm the land's safety. Ignoring this can lead to costly remediation requirements and significant project delays.
Why This Step is Non-Negotiable
Failing to conduct an environmental review can have severe consequences. For example, a property near a historic industrial area in Oklahoma City might have soil contaminated with heavy metals. Similarly, rural land in the OKC metro with a long history of farming could contain residual pesticides. Discovering these issues after construction begins can halt the project and trigger mandatory, expensive cleanup efforts overseen by state or federal agencies.
An early ESA identifies these risks upfront, allowing you to make informed decisions. It might lead to negotiating cleanup costs with the seller, budgeting for remediation, or even choosing a different property altogether. This proactive approach is a fundamental component of the meticulous planning required for successful new home construction in OKC.
Actionable Tips for Your Environmental Review
To navigate this process effectively, follow these best practices:
- Order a Phase I ESA Early: If your property has a questionable history, is near industrial zones, or was previously used for commercial purposes, commission a Phase I assessment immediately.
- Understand Floodplain Designations: Ask your consultant to clarify if any part of your property lies within a designated floodplain, as this will impact foundation design, insurance rates, and building permits.
- Review Findings with Key Partners: Share the environmental report with your builder, lender, and insurance provider to ensure all parties are aware of any potential issues or requirements.
- Budget for Contingencies: If a Phase II assessment is recommended, factor potential remediation costs into your overall construction budget before committing to the project.
6. Utility Service Line Upgrades and Infrastructure Planning: Powering Your Modern Lifestyle
Your dream home requires more than just land and a foundation; it needs the essential lifelines of modern living: water, electricity, gas, and sewer. A crucial part of your site preparation for building a house involves planning and, if necessary, upgrading these utility services. This step ensures the existing infrastructure can handle the demands of a high-performance custom home, from advanced HVAC systems to smart home automation and electric vehicle chargers.
Many lots, especially in rural areas like Macomb or larger properties in Deer Creek, may have services that are undersized or non-existent. Assessing capacity with local providers early in the process is essential. You must coordinate with utility companies to schedule any required trenching, line extensions, or capacity upgrades, ensuring that your home's sophisticated systems will have the power and resources they need from day one.
Why This Step is Non-Negotiable
Failing to plan for utility needs can bring construction to a halt or result in costly post-construction retrofits. For example, many luxury custom homes today require a 400-amp electrical service to power high-end appliances, extensive lighting, and EV chargers. A standard 200-amp service simply won't suffice. Discovering this limitation after the walls are up is a logistical and financial nightmare.
ACET Custom Homes recently worked with a client in the OKC metro who planned an elaborate outdoor kitchen and a heated pool. By assessing their needs during the design phase, we coordinated with OG&E for a significant service upgrade before the foundation was poured. This proactive planning integrated the necessary infrastructure seamlessly, preventing delays and ensuring their home was ready for their lifestyle from the moment they moved in.
Actionable Tips for Utility Planning
To prevent delays and ensure your home is properly powered, follow these best practices:
- Contact Providers Early: Reach out to your electric, water, gas, and sewer providers as soon as you close on your land. Request a capacity assessment for your planned home and ask about timelines for any necessary upgrades.
- Plan for the Future: Size your electrical service based not only on current plans but also on future additions. Consider needs like a backup generator, a second EV charger, or a workshop.
- Get It in Writing: Always request written cost estimates and timelines from utility companies for any extensions or upgrades. This documentation is vital for accurate budgeting and scheduling.
- Coordinate with Your Builder: Share all utility communications and plans with your design-build team. This ensures the home's design, including the placement of meters and connection points, aligns perfectly with the available services.
7. Building Permit Application and Code Compliance Review: Getting the Official Green Light
With your site surveyed, cleared, and designed, the next crucial step in site preparation for building a house involves navigating the world of bureaucracy: the building permit. This formal process is your official request for permission to build, and it serves as a critical checkpoint to ensure your new home is safe, legally compliant, and built to last. It requires submitting detailed architectural plans, structural engineering reports, and other documentation to your local municipality for a thorough review.
Think of the permit office as a partner in quality control. Their job is to verify that your home's design adheres to all local building codes, zoning ordinances, and specific regulations like flood zone requirements or energy efficiency standards. This process prevents construction errors and ensures your home meets the minimum safety standards for your family and community. Without an approved permit, construction cannot legally begin.
Why This Step is Non-Negotiable
Attempting to build without a permit can result in severe consequences, including stop-work orders, hefty fines, and even the forced demolition of unapproved structures. More importantly, it jeopardizes your home’s safety and future value. In Oklahoma, each municipality has its own distinct process. For instance, cities in the OKC metro like Edmond and Norman are increasingly stringent about energy code compliance and may require solar-ready provisions, while rural jurisdictions might have different septic and well requirements.
Navigating these varied requirements is a core part of our service. For a recent project in Piedmont, our early engagement allowed us to ensure the plans perfectly matched local wind-bracing codes before the first submission, preventing a common two-week delay. This proactive approach to code compliance is essential for a smooth and predictable construction timeline.
Actionable Tips for Your Permit Application
To avoid unnecessary delays and ensure a successful permit review, follow these best practices:
- Engage Experts Early: Hire an architect and builder like ACET Custom Homes who have extensive experience with your specific local jurisdiction’s requirements.
- Submit a Complete Package: Double-check that all required documents, from soil reports to structural calculations, are included with your initial application to prevent it from being rejected.
- Budget Adequate Time: In your overall timeline, allocate at least 4-8 weeks for permit acquisition. While some municipalities are faster, it's wise to plan for potential reviews and revisions.
- Request a Pre-Submission Meeting: If your project has unique complexities, ask your builder to schedule a meeting with the building official to clarify any ambiguous requirements beforehand.
8. Site Access and Construction Staging Area Setup: Clearing the Way for Progress
With your lot graded and ready, the next logistical step in site preparation for building a house is creating a clear, functional path for progress. This involves establishing a dedicated construction entrance and a staging area where materials, equipment, and vehicles can be organized. This critical step ensures a smooth, efficient, and safe workflow from the first delivery to the final walk-through.
A well-planned staging area prevents chaos and protects your property. It designates specific zones for material drop-offs, equipment storage, worker parking, and even a portable restroom. This organization prevents damage to the build site, protects surrounding landscaping, and ensures heavy machinery can maneuver without causing costly delays or safety hazards. Think of it as setting up a temporary, highly efficient outdoor workshop for your home's construction.
Why This Step is Non-Negotiable
Failing to plan for site access and staging can quickly derail a project. For instance, in luxury developments like Nichols Hills or The Avards, where lots are close, a haphazard approach can lead to neighbor disputes and municipal fines. We’ve seen projects where concrete trucks couldn’t access the foundation pour site, forcing expensive pump truck rentals and causing major schedule setbacks, all because the initial access road wasn’t properly established.
In more confined urban in-fill projects in OKC's central neighborhoods, every square foot matters. Strategic staging is not just a convenience; it's a necessity. Properly planning where to store lumber, windows, and heavy equipment ensures the build site remains orderly and safe, preventing the kind of logistical nightmare that adds weeks and thousands of dollars to a project’s timeline and budget.
Actionable Tips for Site Access and Staging
To ensure your project runs smoothly from day one, implement these practices:
- Plan the Layout Early: Work with your builder to map out the access road and staging areas before any materials are delivered. This plan should avoid interfering with septic system placement, utility trenches, or future landscaping.
- Protect Existing Features: Before any heavy equipment arrives, install high-visibility protective fencing around mature trees, existing structures, or any landscape features you intend to keep.
- Establish a Solid Base: Create a temporary gravel road for construction traffic. This prevents heavy trucks from getting stuck in Oklahoma’s clay soil after a rainstorm and minimizes mud tracked onto public streets.
- Communicate with Neighbors: If access involves shared driveways or close proximity to other homes, inform your neighbors of the construction schedule. A little courtesy goes a long way in maintaining good relationships.
9. Tree Survey, Preservation Planning, and Arboricultural Assessment
While clearing land is essential, a thoughtful approach to existing trees can transform your property from a blank slate into an established, high-value estate. A professional tree survey and arboricultural assessment is a key part of the site preparation for building a house that focuses on preservation. A certified arborist evaluates the health, age, species, and structural integrity of every significant tree on your lot to determine which are assets worth saving.
This step allows you to integrate nature directly into your home's design. Oklahoma's majestic native oaks, elms, and cedars not only provide shade and beauty but can significantly increase your property's market value. By identifying these valuable trees early, your architect and builder can work to position the house, driveway, and utility lines to protect them, creating a home that feels instantly rooted in its environment.
Why This Step is Non-Negotiable
Skipping this assessment can lead to irreversible damage to valuable trees or, conversely, retaining unhealthy trees that pose a future risk to your home. On a recent project in Edmond, a client’s initial site plan called for removing a sprawling, century-old oak. An arboricultural assessment revealed the tree was not only healthy but was also a "specimen" tree that added an estimated $50,000 to the property value. We were able to adjust the home's placement to save it, creating a stunning natural centerpiece for their backyard.
In wooded areas like those found near Piedmont or in rural Cleveland County, this process is even more critical. It helps distinguish healthy, desirable hardwoods from invasive or weak-wooded species like Bradford pears, ensuring your long-term landscape is both beautiful and safe. Protecting tree roots from soil compaction and equipment damage during construction is a vital aspect of a well-managed build.
Actionable Tips for Your Arboricultural Assessment
To maximize the value of your property's natural assets, follow these key steps:
- Hire an ISA-Certified Arborist: Don't rely on a standard tree removal service for this assessment. An arborist certified by the International Society of Arboriculture (ISA) has the expertise to evaluate tree health and create a viable preservation plan.
- Identify and Protect Key Trees Early: Work with your arborist and design team to identify "heritage" or high-value trees before architectural plans are finalized. This ensures the home's design complements the landscape, not fights it.
- Establish Tree Protection Zones (TPZs): Before any heavy machinery arrives, insist on installing sturdy, highly visible fencing around the drip line of every tree designated for preservation. This physical barrier is the most effective way to prevent root damage.
- Communicate the Plan Clearly: Ensure your builder holds a pre-construction meeting where the tree protection plan is reviewed with every subcontractor. This prevents accidental damage from excavation, material staging, or vehicle traffic.
10. Demolition, Clearing, and Site Preparation Execution: Shaping the Canvas
This is the phase where your property undergoes its most dramatic transformation. After months of planning, demolition, clearing, and execution turn your raw land into a clean, graded homesite ready for the foundation. This crucial step involves removing any existing structures, clearing trees and vegetation, grubbing out roots and stumps, and performing the final excavation to bring the site to its engineered grade.
This isn't just about moving dirt; it's a precise operation that sets the stage for everything to come. Proper execution of this final step in the site preparation for building a house is essential for ensuring structural stability, preventing future settling issues, and establishing correct drainage from day one. This stage turns the blueprint into a tangible reality, preparing the ground for your dream home’s first physical form.
Why This Step is Non-Negotiable
Rushing or improperly managing this phase can compromise the entire build. For instance, many infill projects in established Oklahoma City neighborhoods like Nichols Hills or the Village require careful demolition of an old house. Failing to properly remove the old foundation or backfill the area can create unstable soil, leading to severe foundation problems down the line. We ensure all old materials are completely removed and the ground is re-compacted to engineering specifications.
In rural settings like Guthrie or Shawnee, the challenge is often extensive vegetation. Insufficient grubbing, where roots are left in the ground, can lead to decomposition that causes voids under your foundation, resulting in costly cracks and settling. This meticulous work, though messy, is a foundational guarantee for the long-term integrity of your custom home.
Actionable Tips for Clearing and Execution
To ensure this phase goes smoothly, follow these best practices:
- Implement Erosion Control First: Before any heavy equipment arrives, install silt fences and other erosion control measures as outlined in your SWPPP to protect your property and adjacent areas.
- Mark Utilities Clearly: Triple-check that all underground utility lines are clearly and accurately marked to prevent dangerous and expensive accidents during excavation.
- Plan for Debris: Decide ahead of time how you will manage debris. Many materials, like concrete from an old driveway or wood from cleared trees, can be recycled or repurposed into mulch, reducing waste and disposal costs.
- Protect Valued Features: If you plan to keep any mature trees or natural rock outcroppings, ensure they are clearly marked and protected with sturdy barriers to prevent accidental damage.
Frequently Asked Questions (FAQ)
What are the first steps in preparing land to build a house?
The very first steps are conducting a professional land survey to establish legal boundaries and performing a geotechnical soil test to understand the ground conditions. These two actions provide the essential data needed for architects to design the home and engineers to design a stable foundation.
How do you clear land before building?
Land clearing involves several stages: removing trees, shrubs, and large rocks; "grubbing" to remove stumps and root systems; demolishing any existing structures; and then grading the site to the specified elevations according to the engineering plans.
How much does it cost to prepare land for building a house in Oklahoma?
The cost varies widely based on the lot's condition, location, and size. In Oklahoma, basic clearing and grading can start from $5,000-$10,000 for a simple lot. However, costs can exceed $30,000 or more if it requires extensive tree removal, significant grading, demolition of an old home, or utility extensions in rural areas like Elmore City or Macomb.
What is the most important step in site preparation?
While all steps are critical, geotechnical soil testing is arguably the most important. The results directly influence the design of your home's foundation—the single most critical structural element. An improper foundation design due to poor soil data can lead to catastrophic and expensive failures.
Ready to design your custom home? Schedule a free consultation with ACET Custom Homes today.
Consultation Today!